There are lots of ways to build a DIY backyard fire pit, and you can design one that is wood-burning, gas-burning or uses a propane tank. I’m all about easy, so I’ve included a few step-by-step tutorials below that show how to make your own fire pit in an afternoon or a weekend – and with minimal cost.
Check out this video. It may be all you need to get started:
- Check with local ordinances and homeowner regulations to see if fire pits are allowed in your neighborhood.
- Choose an open location in your yard that isn’t near low-hanging trees or overhead items that might catch fire.
DIY Backyard Fire Pit in 4 Steps
1. Get Your Supplies
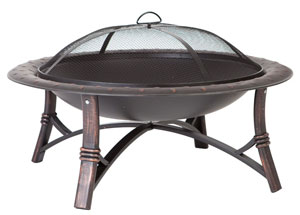 Essentially, all you need for this project are stackable concrete wall blocks and a fire bowl with a lip. You can also find them at Amazon.com.
Most home improvement stores will sell a variety of stackable pavers, so you can choose a style that you like best. There also usually different colors to choose from (like tan, grey and red), so you can mix a variety of shades or stick with one solid tone.
Additionally, you will need wood to burn in your fire pit, and you may need concrete pavers if you are building a patio base (see step 2).
2. Create Your Patio Base
Build a patio base using basic pavers that you can get at your local home improvement store. Add a gravel base with a layer of sand, level the area and add your pavers. If you already have a backyard patio on which to build your fire pit, you can skip this step.
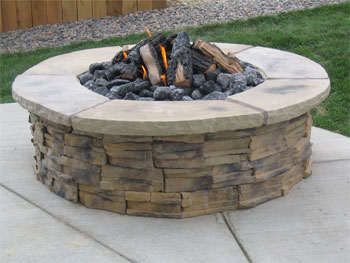
3. Build Your Fire Pit Walls
This step is so much easier than other construction methods, I love it. You don’t even need masonry adhesive. Simply measure the circumference of the fire bowl by setting the lid on the ground at your chosen fire pit location. Then, stack your concrete blocks around the lid about 4 levels high. Stagger them for strength.
4. Set the Tray on the Stacked Blocks
Take your fire bowl tray (with the legs removed) and set it on top of the stacked concrete blocks. It should fit perfectly and securely. Set the grate inside the tray and then the logs and finally the lid.
NOTE: Besides keeping embers safely in the pit, the lid also keeps leaves and other debris from getting in your fire pit. It’s a great accessory that typical DIY versions don’t have.
Why Do I Like this Fire Pit Design?
1. It Adds Value
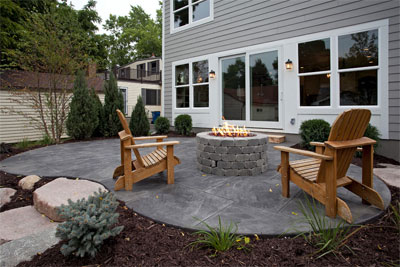 Although this DIY project does not involve fancy complicated plans, I think it can add value and style to virtually any backyard. Why? Because it looks built-in, especially when it is surrounded by a concrete patio.
The concrete blocks give it a more permanent appearance, and the fire bowl dresses it up much more than a bed full of loose gravel. Add some adirondack chairs or colorful patio loungers around it, and you can easily create a designer backyard look.
2. You Can Save a Bunch of Money
Why hire a contractor to hardscape your backyard when you can build your own fire pit in an afternoon? Then you can take all of the money you saved and invest in great-looking, comfortable patio furniture to sit in while you are enjoying the fire?
3. It’s Easy!
 Many “simple” backyard fire pit designs that use stable concrete blocks also require you to build an inner fire wall and create a concrete foundation. To me, that just sounds like a lot of extra work and time mixing concrete and setting blocks. Plus, there are more supplies that I need to buy. Who wants that?
I did want to include an alternate video on building a stone fire pit without using the fire bowl. This design uses gravel as its base and is situated in the middle of a grassy area. If you want to make a larger size or even a square version, this concept might even work better for you…